
Working with Library Groups
Answer
Working with Library Groups
What is it?
ILLiad allows you to group lenders together for statistical purposes. Based upon these groups, routing rules can also be set up to import lending requests into separate group queues (example: Awaiting IDS Request Processing, Awaiting Charge Processing, Awaiting Reciprocal Lender Request Processing)
How does it help?
By setting up Groups and assigning libraries to those groups, you can run custom reports on specific consortia or group borrowing/lending practices.
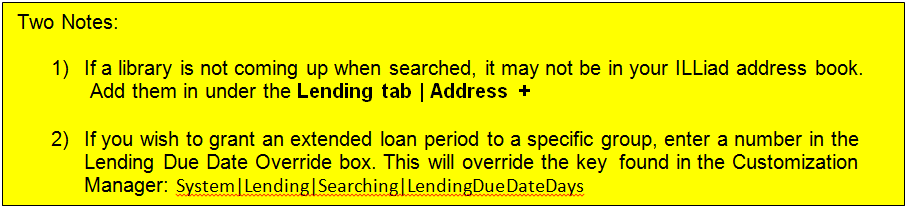
Also, in Groups Maintenance, extended or shortened due dates can be granted to certain groups, overriding the LendingDueDateDays key. This is found in the Customization Manager under: System|Lending|Searching|LendingDueDateDays
Getting Started
https://prometheus.atlas-sys.com/display/illiad/Maintenance+Functions
Working with Library Groups
-
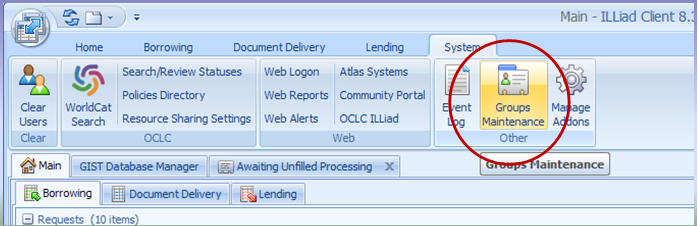
Under System tab open Groups Maintenance
-
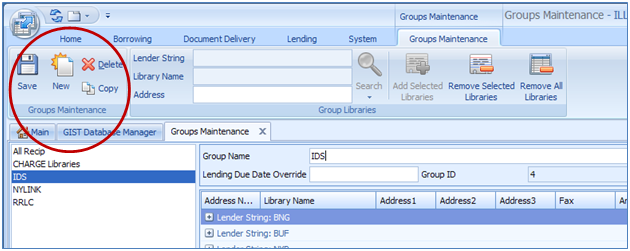
To make a new group <click> New
-
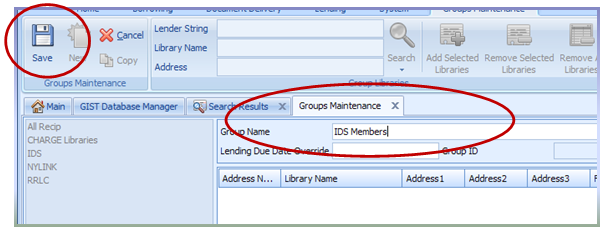
Assign your new group a name and type it into Group Name. Then <click> Save.
-
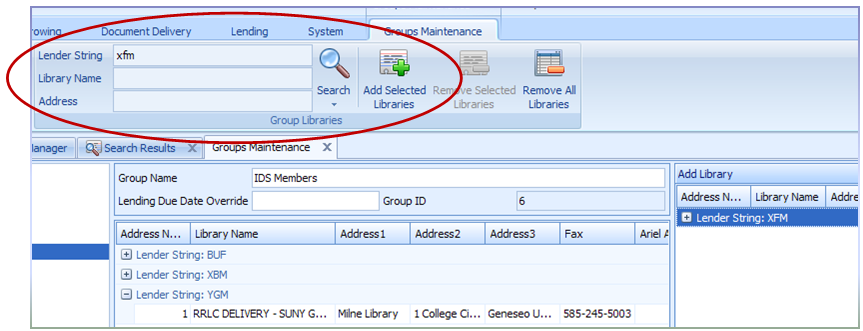
To add a library, first locate them by 3 letter OCLC code, library name, or address and then <click> Add Selected Libraries.
-
Finished adding libraries? Make sure you <click> the Save icon.
Things to consider
-
What groups of libraries would you like to run reports on?
-
Are there groups of libraries you would like to extend or shorten loan periods for?
Routing Rule to separate Library Group requests into separate Queues
-
Do you wish to separate incoming Lending requests for specific groups of libraries (example IDS, local consortium, libraries you charge)?
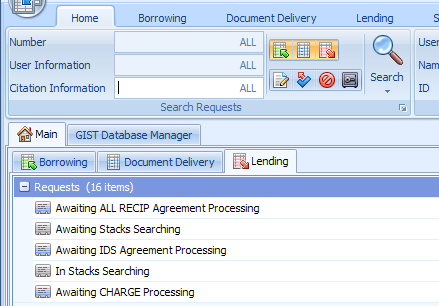
Once groups are set up, incoming Lending Requests can be routed into separate queues based on the Group Number. In the example below, requests are presorted into Awaiting CHARGE Processing, Awaiting IDS Agreement Processing, Awaiting ALL RECIP Agreement Processing queues versus all importing into Awaiting Lending Request Processing.
Getting Started
A special queue
-
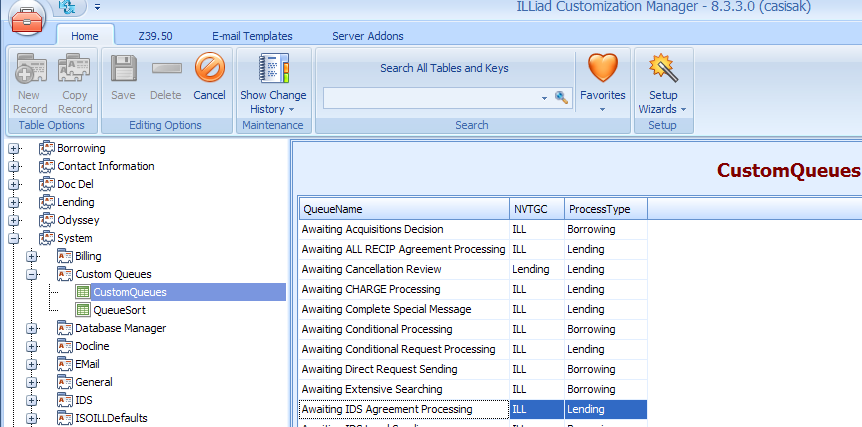
In the Customization Manager, expand System|Custom Queues|CustomQueues.
-
<Click> New Record to create a queue.
-
Add the values for the new queue. Don’t forget to <click> Save.
|
Queue Name |
(The name for the queue. Ex. Awaiting IDS Processing) |
|
NVTGC |
ILL |
|
Process Type |
Lending |
Identifying the Group
-
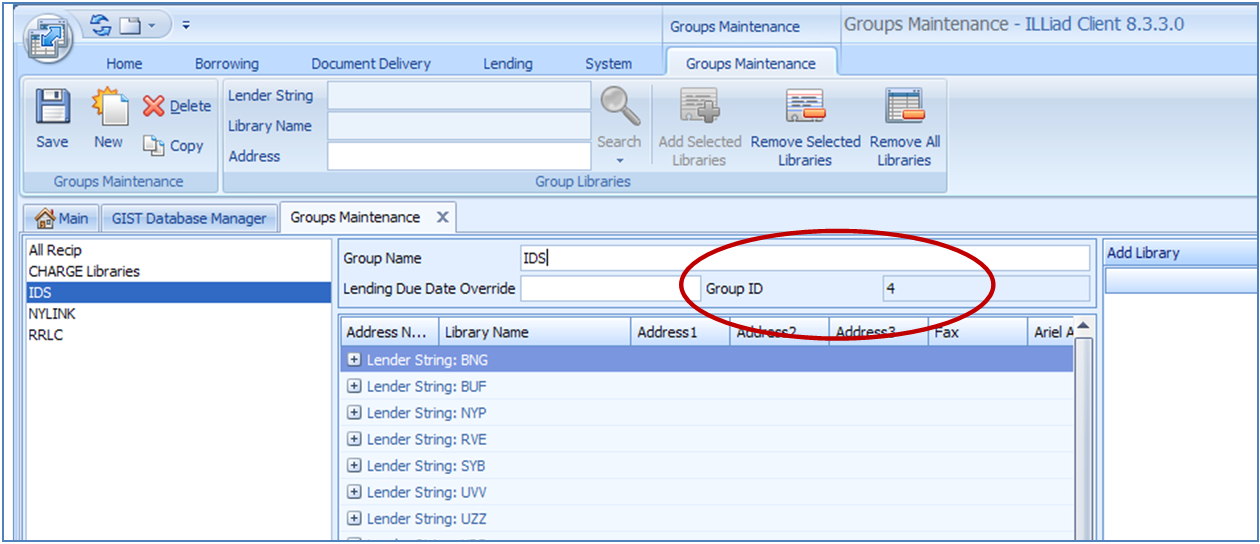
In the Client, open Groups Maintenance tab.
-
<Click> the group name in the list (on the Left). This will bring the Group Name into the Group Name box and identify the group number, or GroupID. In this example IDS group is GroupID 4.
The Routing Rule
-
In the Customization Manager, expand System|Routing|Routing
-
<click> New Record
-
Enter the following:
|
Rule No |
(Should be the first Lending rule) |
|
Rule Active |
Yes |
|
Process Type |
Lending |
|
Match String |
t.lendinglibrary in (select lenderstring from groupslink where groupnumber =[place your group number here]) |
|
New Process Type |
Lending |
|
New Transaction |
[enter your new custom queue name] |
|
Rule Description |
Rule to route all new IDS lending requests into new IDS queue |

-
Remember to Save.

Assigning libraries to a Queue using the BorrowerStatus table
-
In the Customization Manager, expand Lending|Import Queues|BorrowerStatus

-
To add a new record:
-
<click> New Record.
-
Fill out the record:
|
Borrower |
(OCLC symbol) |
|
Status |
(the Custom Queue name) |
|
NVTGC |
ILL |
-
<click> Save